First attempt at a Dutch Bucket Hydroponics Setup
This year, was my first attempt at a dutch-bucket hydroponics setup. I wasn't sure how well it would do, so I decided to played it safe and built three modules to grow the following plants: green-pepper, tomato, and a jalepeno.
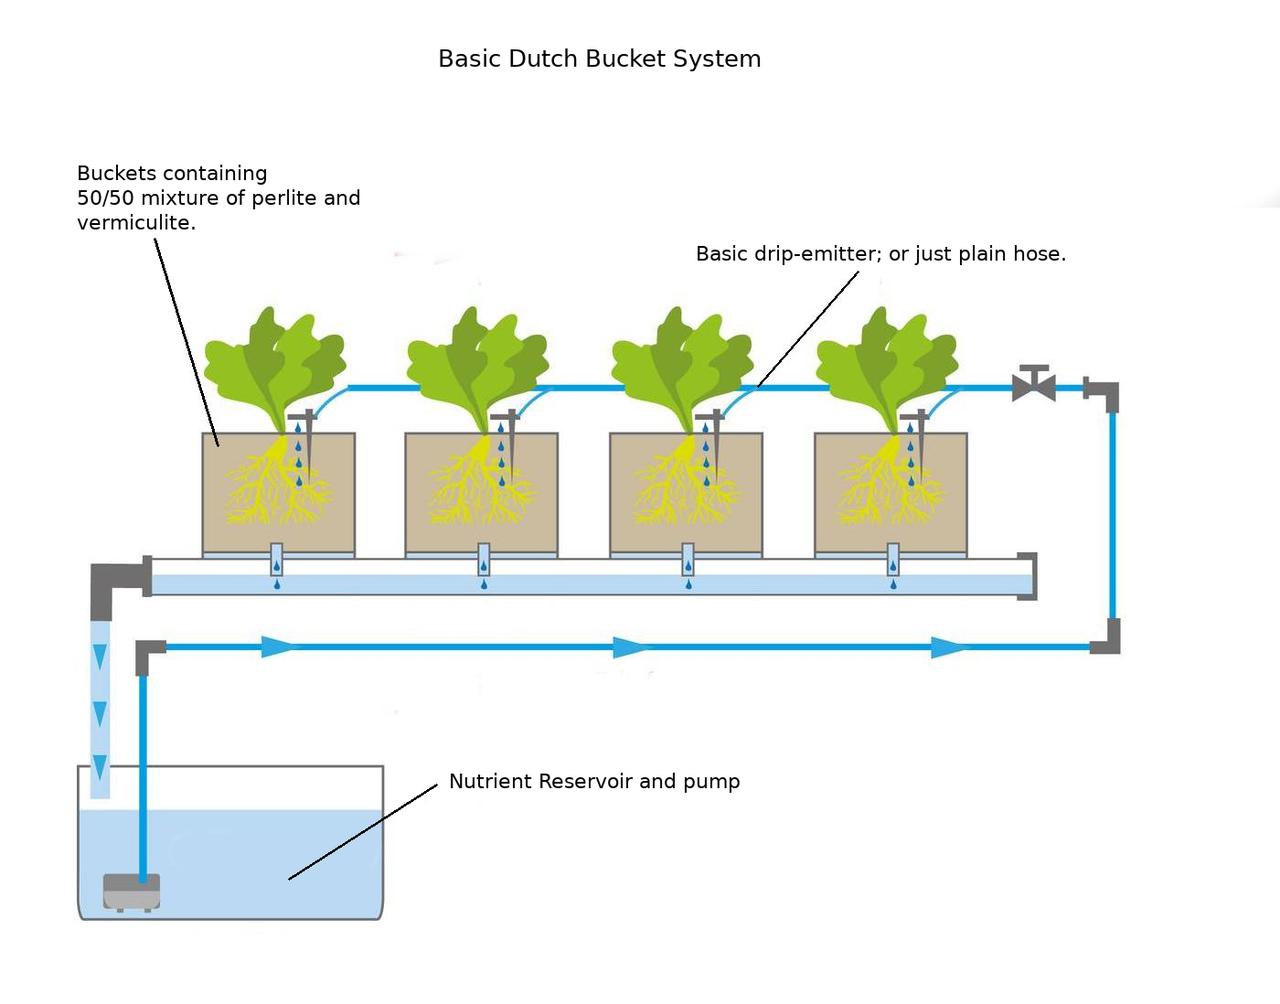
Basic setup:
The system is pretty simple; it consists of the following components:
Buckets containing a paint-strainer, filled with perilite/vermiculite.
A reservior tank containing the nutrient solution.
A pump to circulate the solution to the plants.
Plumbing/pipes to get the nutrient solution around.
Valves on each emitter to control how much nutrient each plant receives.
A timer to control the pump.
(Optional) Air-pump and air-stone
Nutrient Solution used:
Essential nutrients can be broken down into macronutrients and micronutrients. Both Macro and micro-nutrients are essential for plant growth and development.
Macronutrients consist of:
carbon
hydrogen
oxygen
nitrogen
phosphorus
potassium
sulfur
calcium
and magnesium
Micronutrients include the following:
iron
manganese
zinc
boron
molybdenum
chlorine
copper
and nickel.
Macronutrients are required in higher amounts than micronutrients.
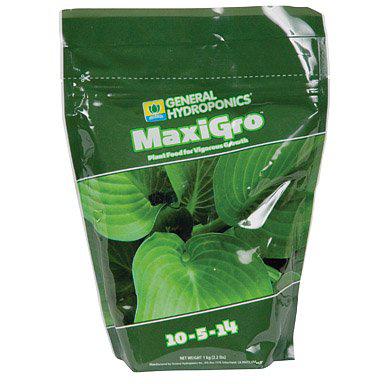
I've experimented with various solutions, in a few different hydro-setups. Some come in a variety of solutions and you need to mix and match. So far I'm amazed with MaxiGro; you literally mix and use.
MaxiGro powdered Nutrient solution (found on Amazon) ------------------------>
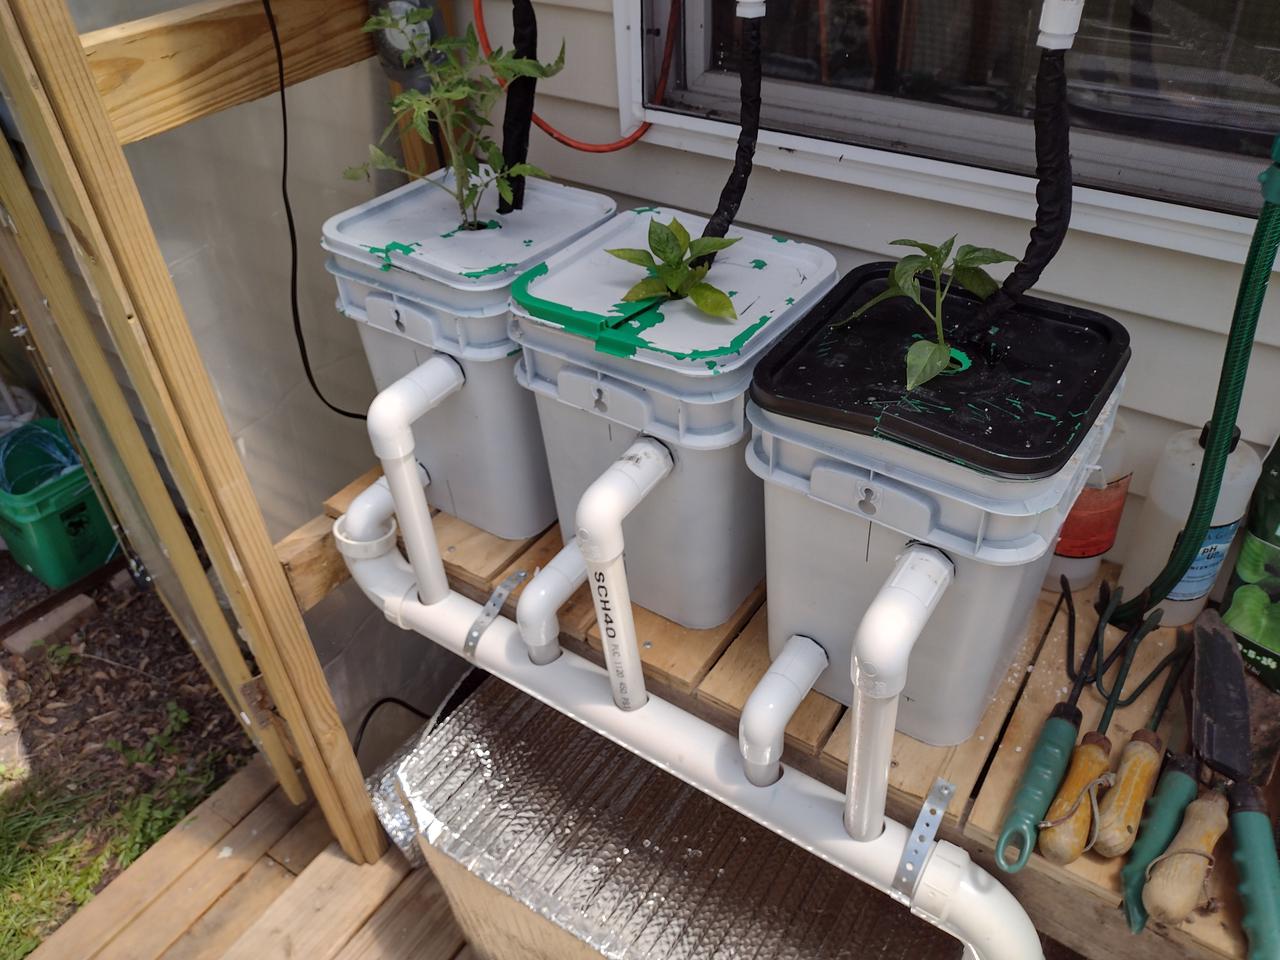
This was my initial planting. You can see how small the plants were. You might notice that each container has two sets of pipes. I added the secondary pipe, higher up, as a fail-safe. In the past I've had the drain-pipe, in a container, get plugged with roots. This caused the nutrient solution to spill over and it eventually depleted the resevoir. If it's not caught, you crop may die. Unfortunately this happened to me on my first hydro-setup. I was away, on a trip for a few days, coming home; I was greeted with dead-plants. :(
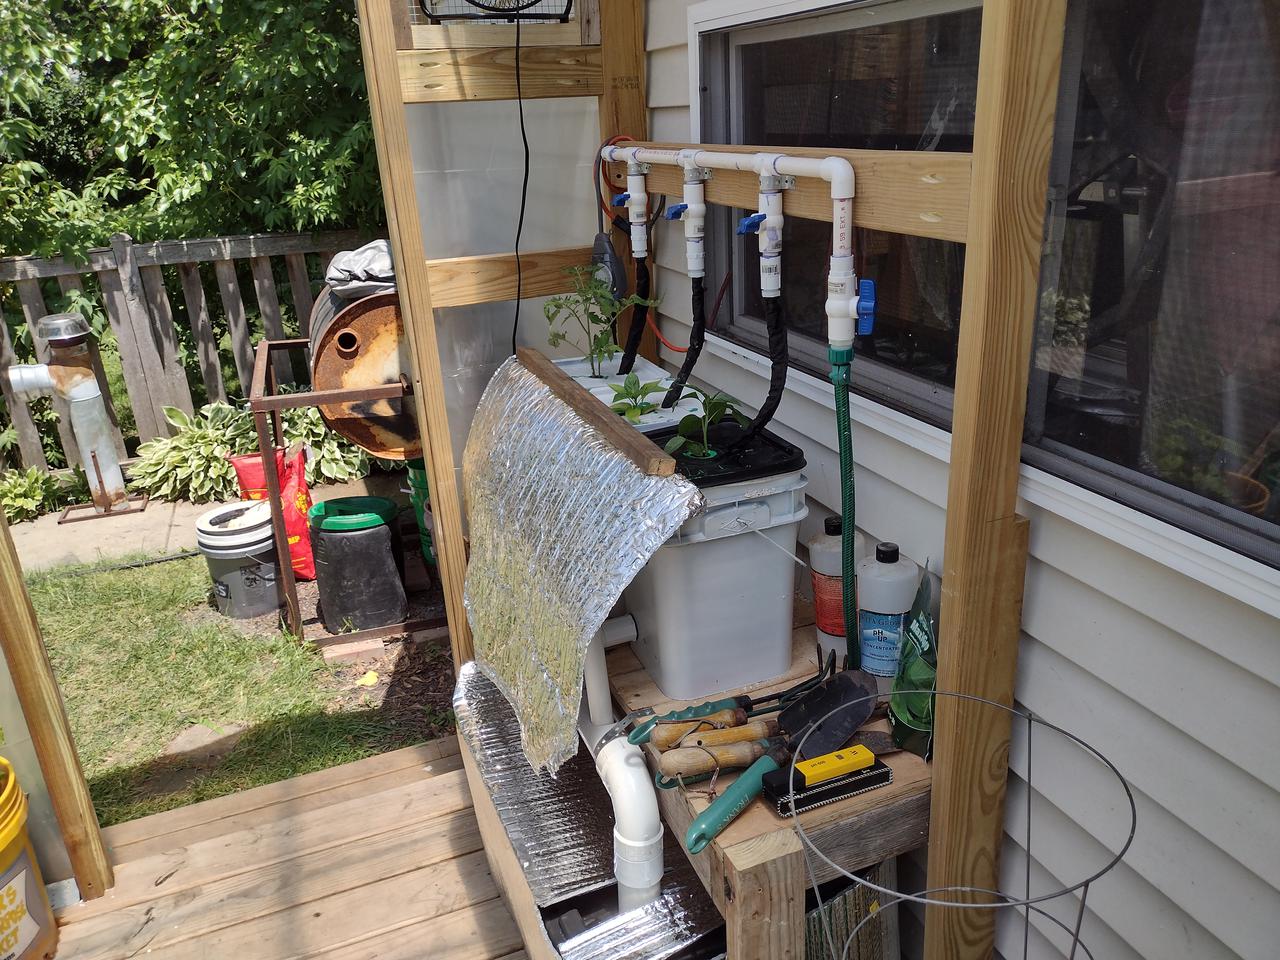
You can see here, the various valves, used to control the rate of nutrient-flow, to each plant. I need to investigate, if drip-emitters would work with this type of pump. I suspect I'll see a problem as I increase the amount of emitters, with this type of setup. The foil acts as a solar-radiation-shield. The root-systems really need to be in the dark, or mold/fungi will form.
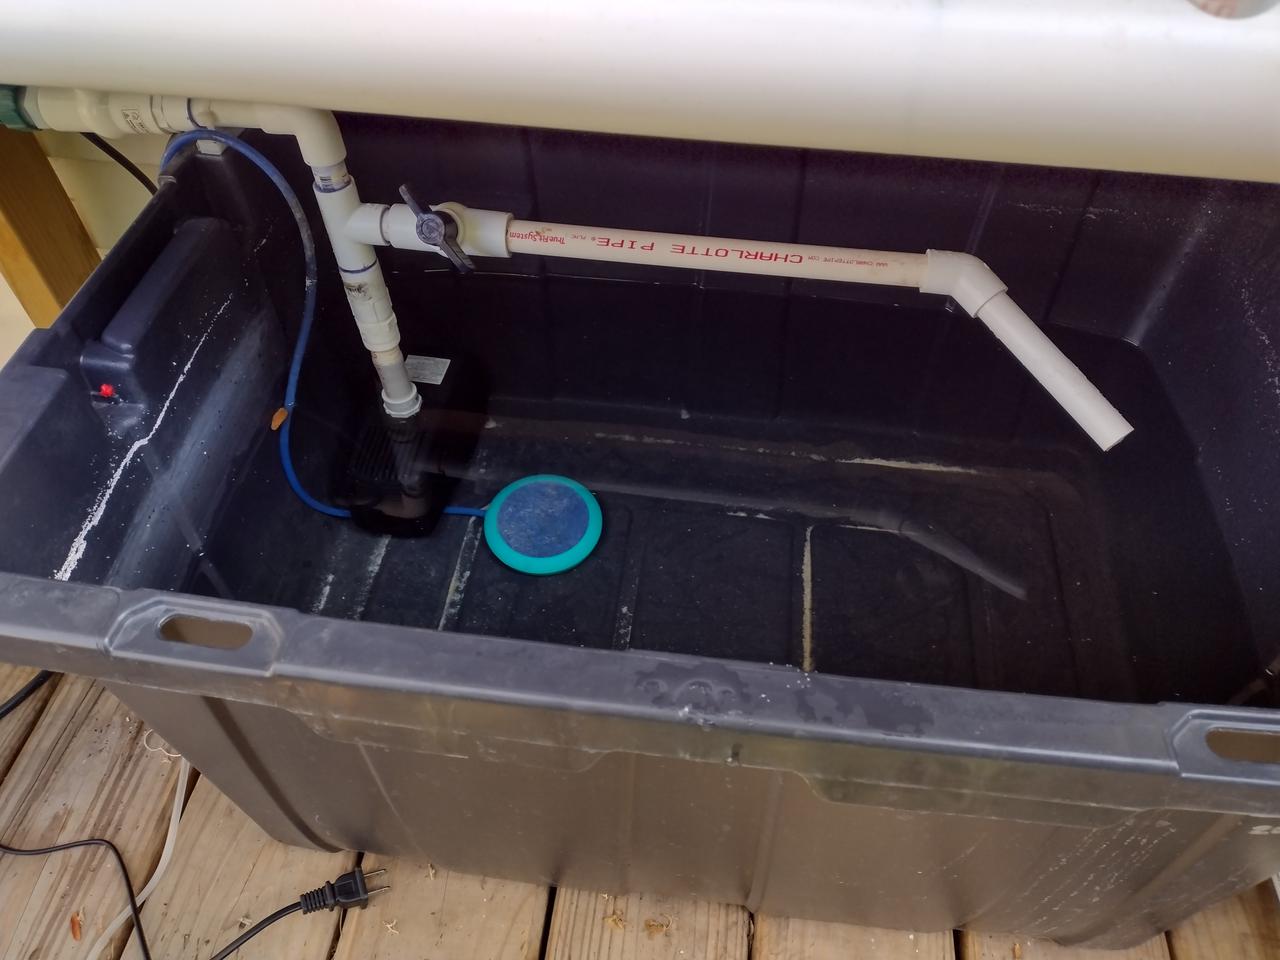
Here's a view of the resevoir. If you look close-enough, to the lower-left, you'll be able to see the pump and air-stone. The horizontal-pipe, is a recirculator-line; the idea being you want the nutrient solution aggitated and mixed.
The air-stone aerates the solution, helps with mixing, and reduces the chances of any fungi-growth.
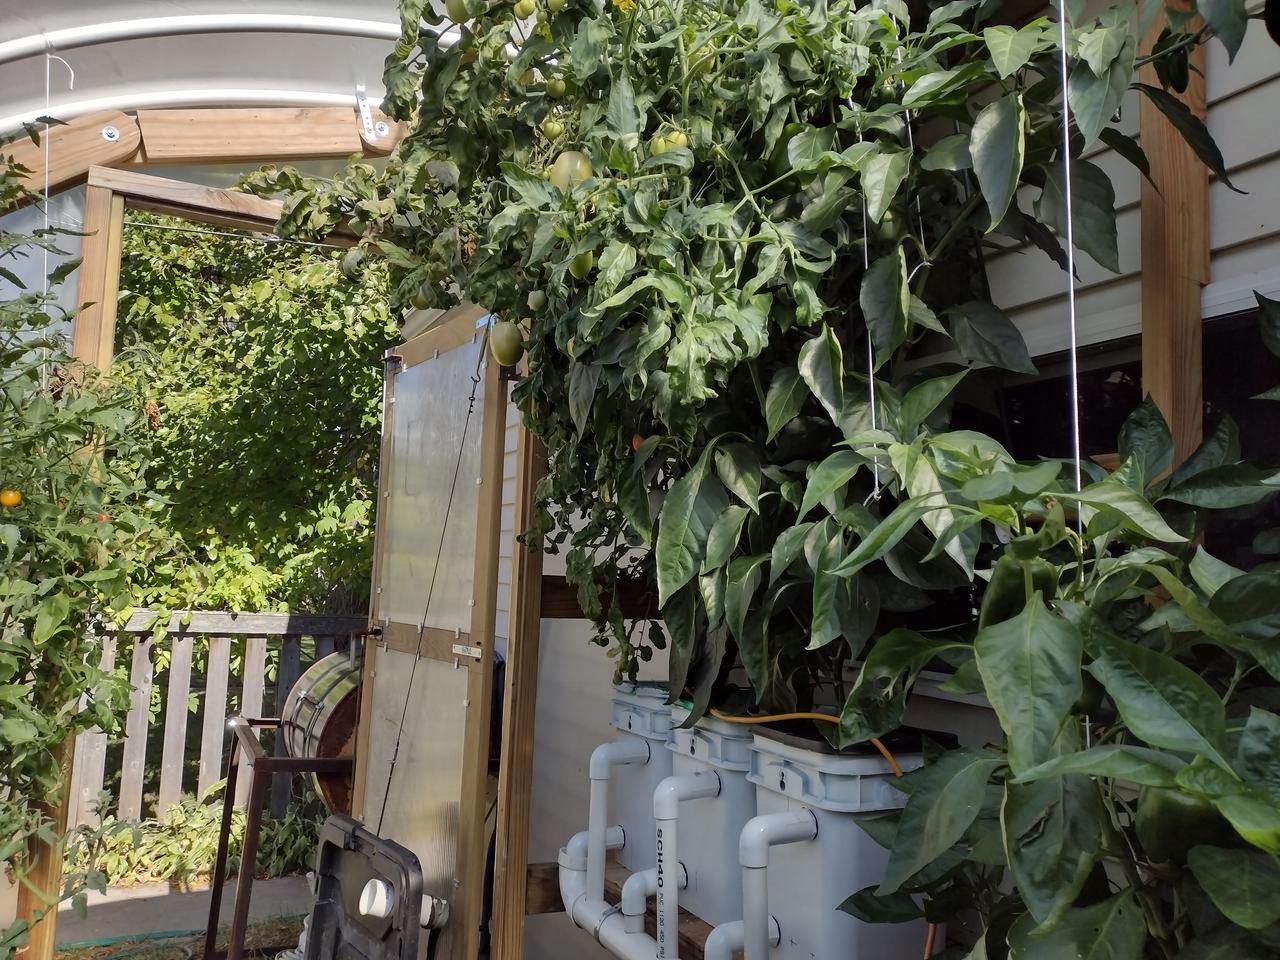
As you can see, the plants grew like crazy. The green-pepper-plant, in the middle-container, grew, but it only produced one or two peppers. I later discovered that you don't want to plant tomamto and pepper-plants together. Evidently they don't like each other.
The reason the plants look a bit "wilty", is we've been experiencing a cold-snap, 30-degree nights, during these past-few days. I'm hoping the greenhouse will help them survive a few more-weeks longer.
Comments