Shop Welding Exhaust System
[WORK IN PROGRESS] Welding Fume Extraction Setup
Most people who weld, know that the fumes created, during this process, are pretty nasty for you.
Said fumes can contain all manner of components, such as: Carbon Monoxide, Carbon Dioxide, Nitric Oxide, etc.
Wanna know more? OSHA Fact Sheet

|

|
|
When I first got into welding, I inadvertently, exposed myself to zinc-welding-fumes. What I initially thought was a flu, turned out to be what's commonly called the "zinc-flu". I was extremely lucky since it can be deadly.
After I discovered this little-fact, I realized I needed to take personal-protection more seriously.
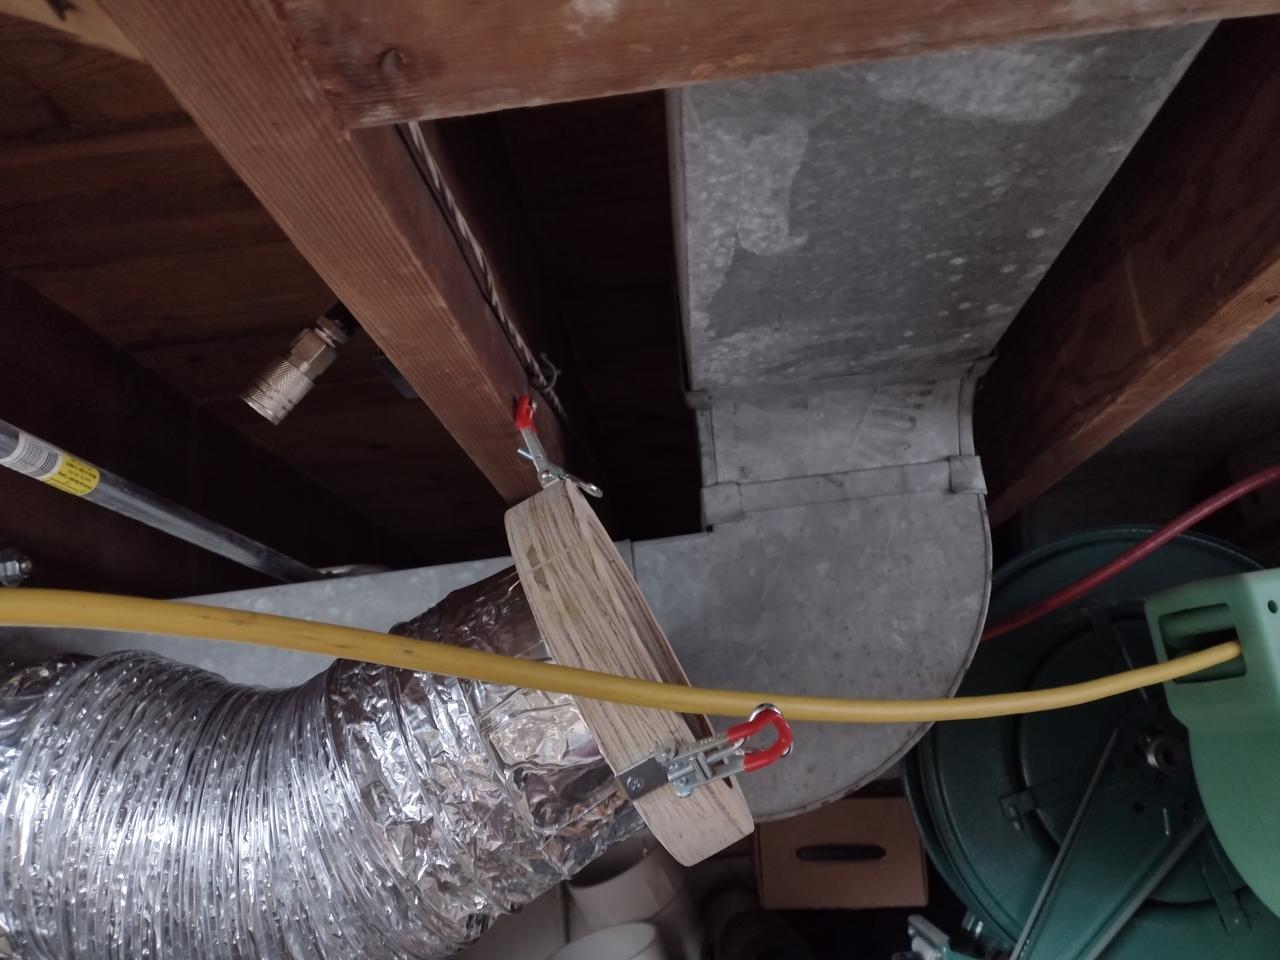
Here's some proof, you can see the exhaust-fan, and hose, in the pictures above.
Said hose is positioned out a window and while this setup works well; it's both time-consuming and tedious to setup.
First the window, and bug-screen needs to be removed.
The hose needs to be dragged out of it storage-location, attached to the fan, then pushed out the window.
Usually I'll run outside and angle to hose to be 90-degrees, from the window's orientation; thus minimizing any return-fumes.
From there, the fan, which is somewhat heavy, needs to be positioned close to the welding location.
I needed something better and more efficient.
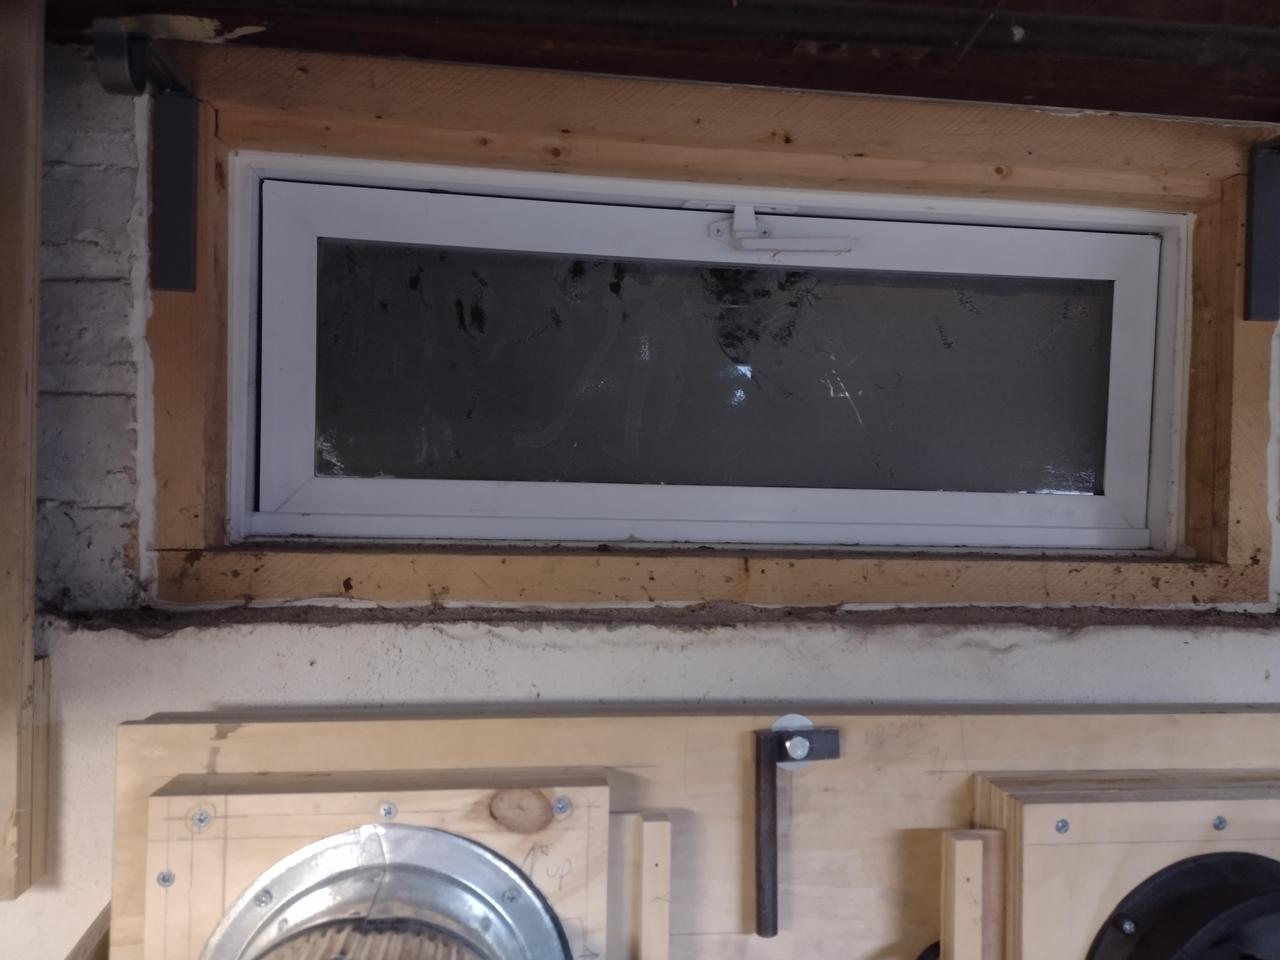
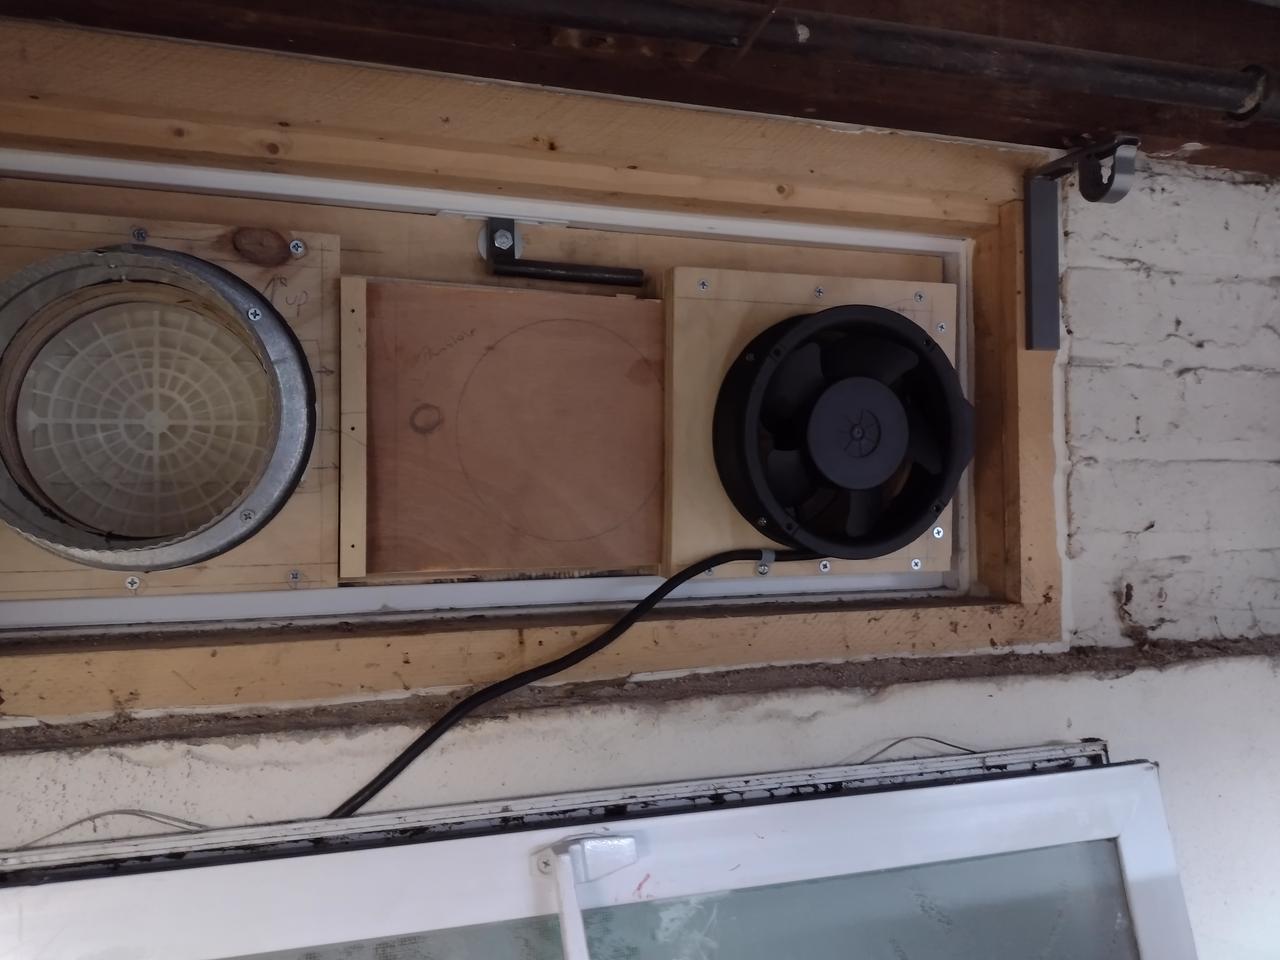
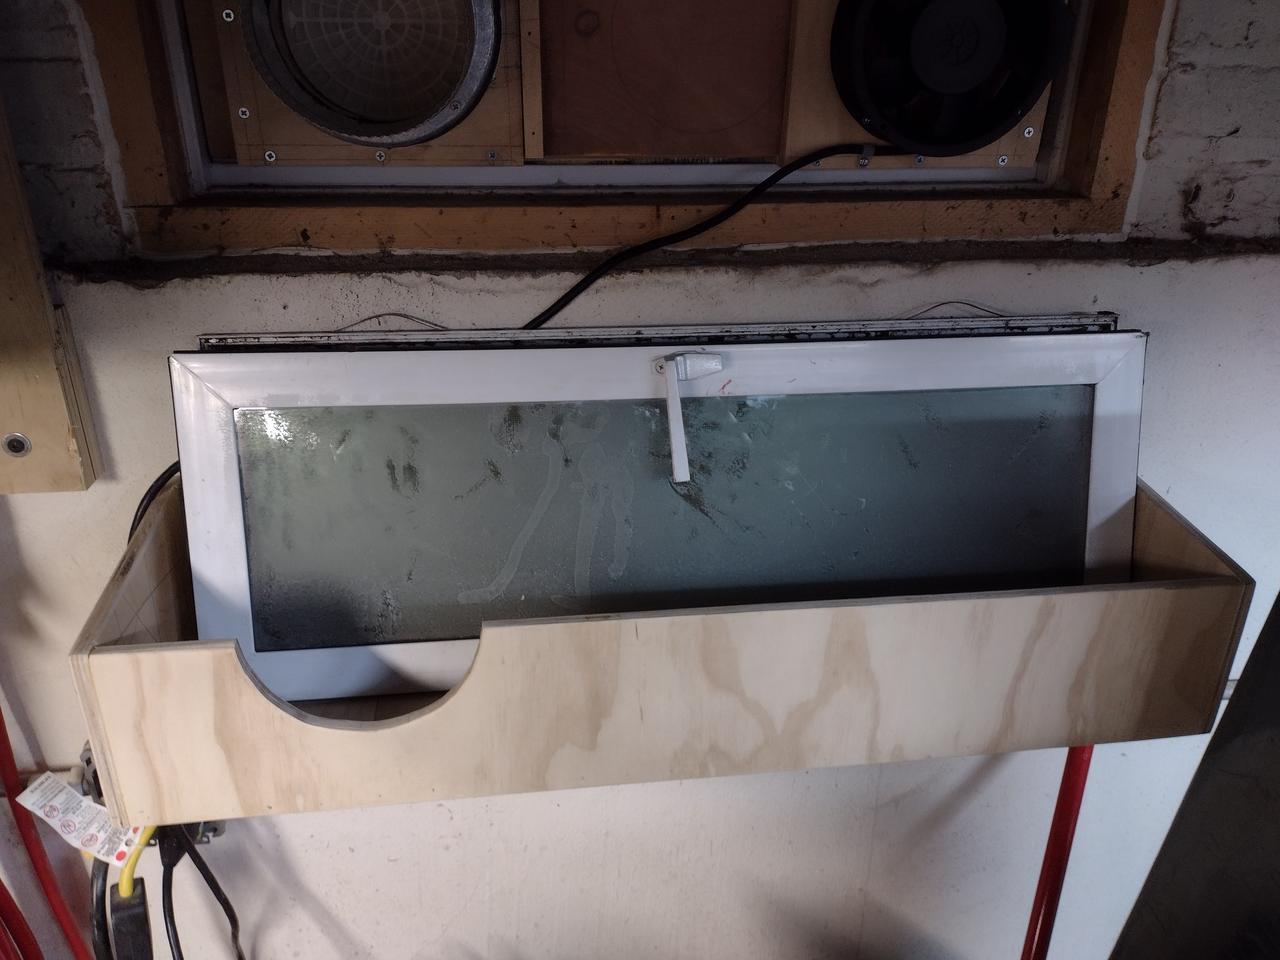
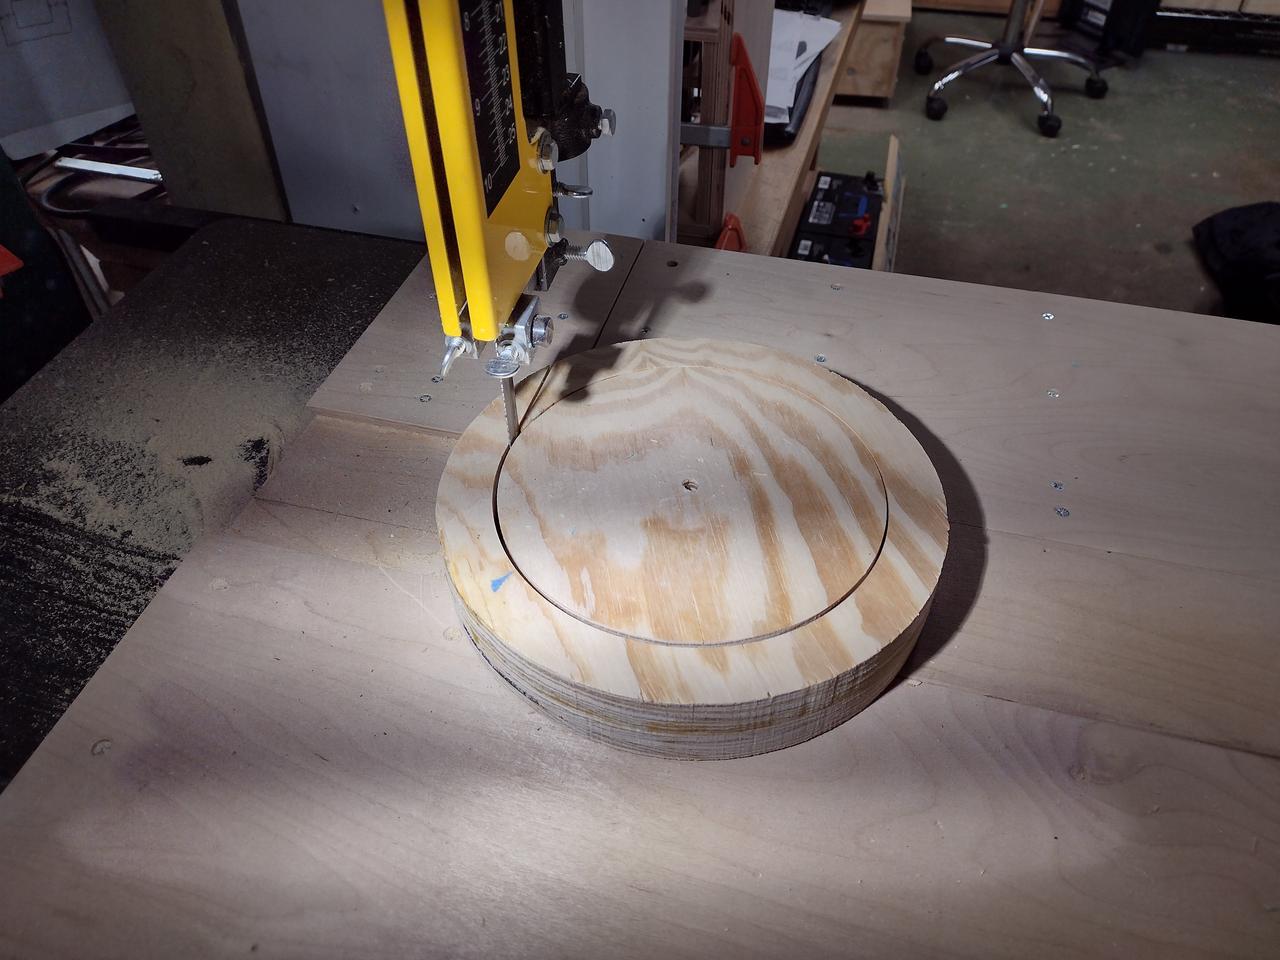
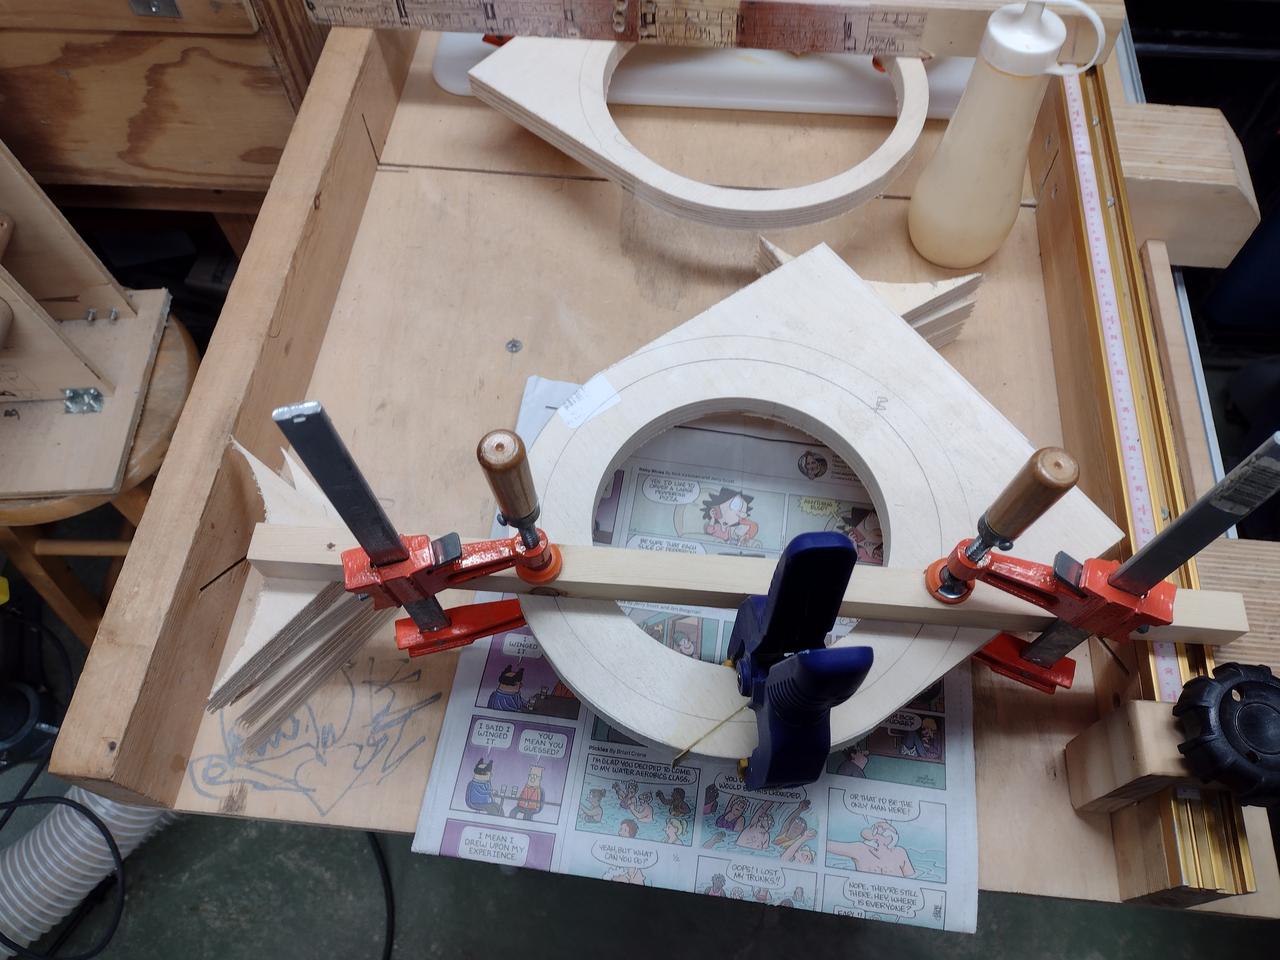
Window-Insert
In the overall excitment of building this unit, I didn't take any build-pictures. In a nutshell, this insert was created from a basic-sandwich of 1/2" plywood, between 3/4" thick insulating foam.
The ventilation holes were cut out using a 6" hole-saw.
The window-handle was created from scrap metal:
1/2" x 6" steel rod - for the handle.
1" x 2" x 0.25 flat-stock - for the latch.
|

|
|
|
|
|

|

|
|

|
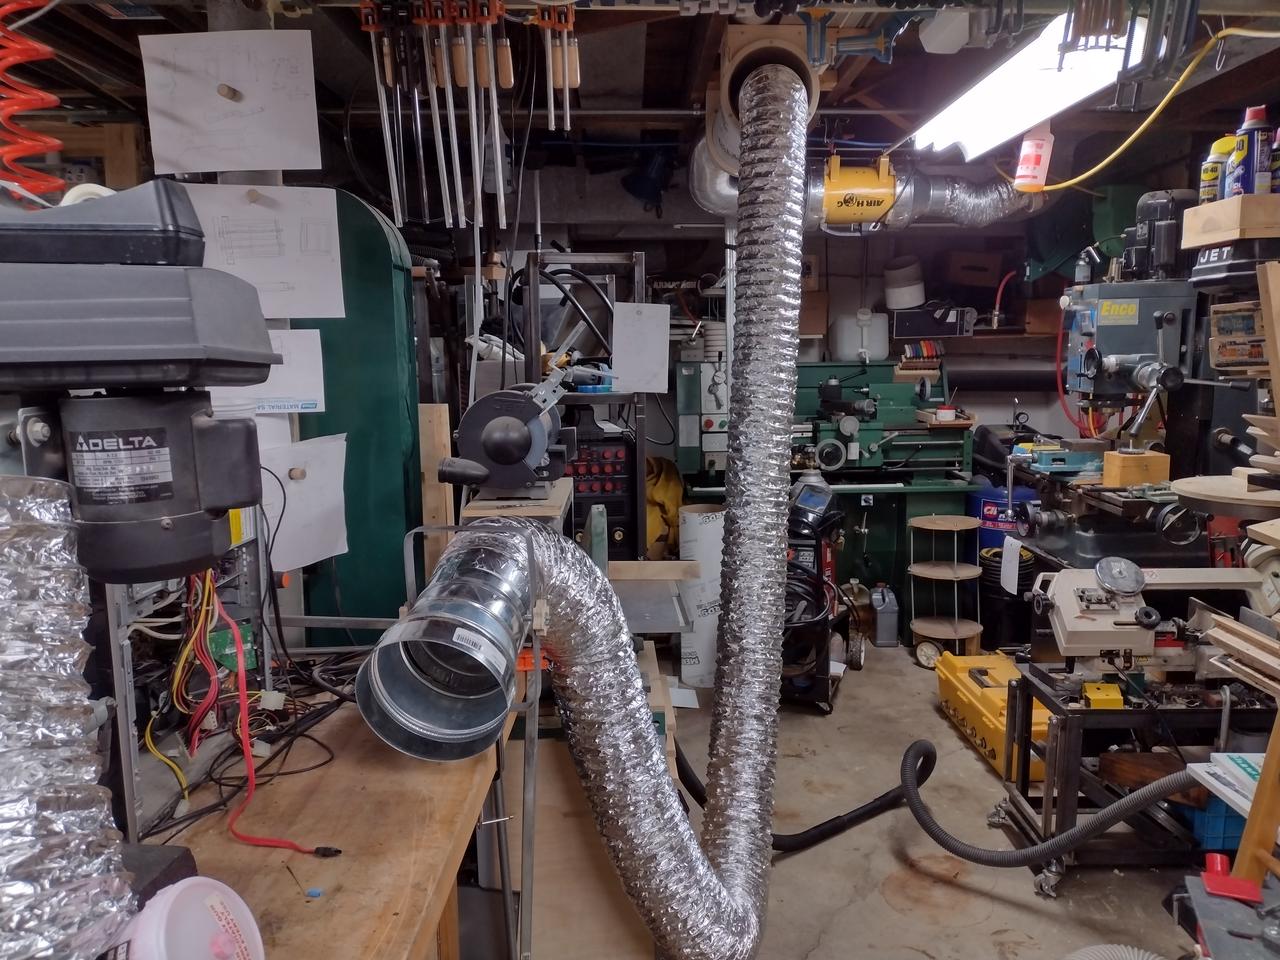
Repurposing the Fan-unit

I bought the "Air Hog"-unit, a long time ago, from Enco; which later got acquired by MSC. Back then, it cost me just over $100; now-a-days the same unit goes for well over $240.00. Thankfully there are cheaper alternatives. Harbor-Freight carries a similar model.
Sadly I didn't take any pictures, in how I converted this unit; but it's rather simple. The outer-diameters were around 10-inches; I found a pair of 12 to 6" reducers at menards.
Two 12" wooden rings <hoops>, with an inner-diamater of 10.25", were created from 3/4" plywood. The 10.25"-inner diamater was needed, so I could slip these over the ends of the fan-unit. I used bolts, threaded-through the hoops, to center and align each hoop, on each-end of the fan. The 12-to-6" reducers were then slipped over the wooden-hoops, and screwed down. I used aluminium-tape, and some silicone-caulk to seal things up.
The nice thing about this setup, is the day the fan dies, I can swap out the unit, with a harbor-freight unit; providing the sizes match. I think they do..... <maybe?? probably??>
How to position near a welding spot.
|

|

|
|
Rather than just leaving a simple-hose, as my intake, I wanted to make it look something a little-sharper. Using another hvac-reducer made it look rather professional. :)
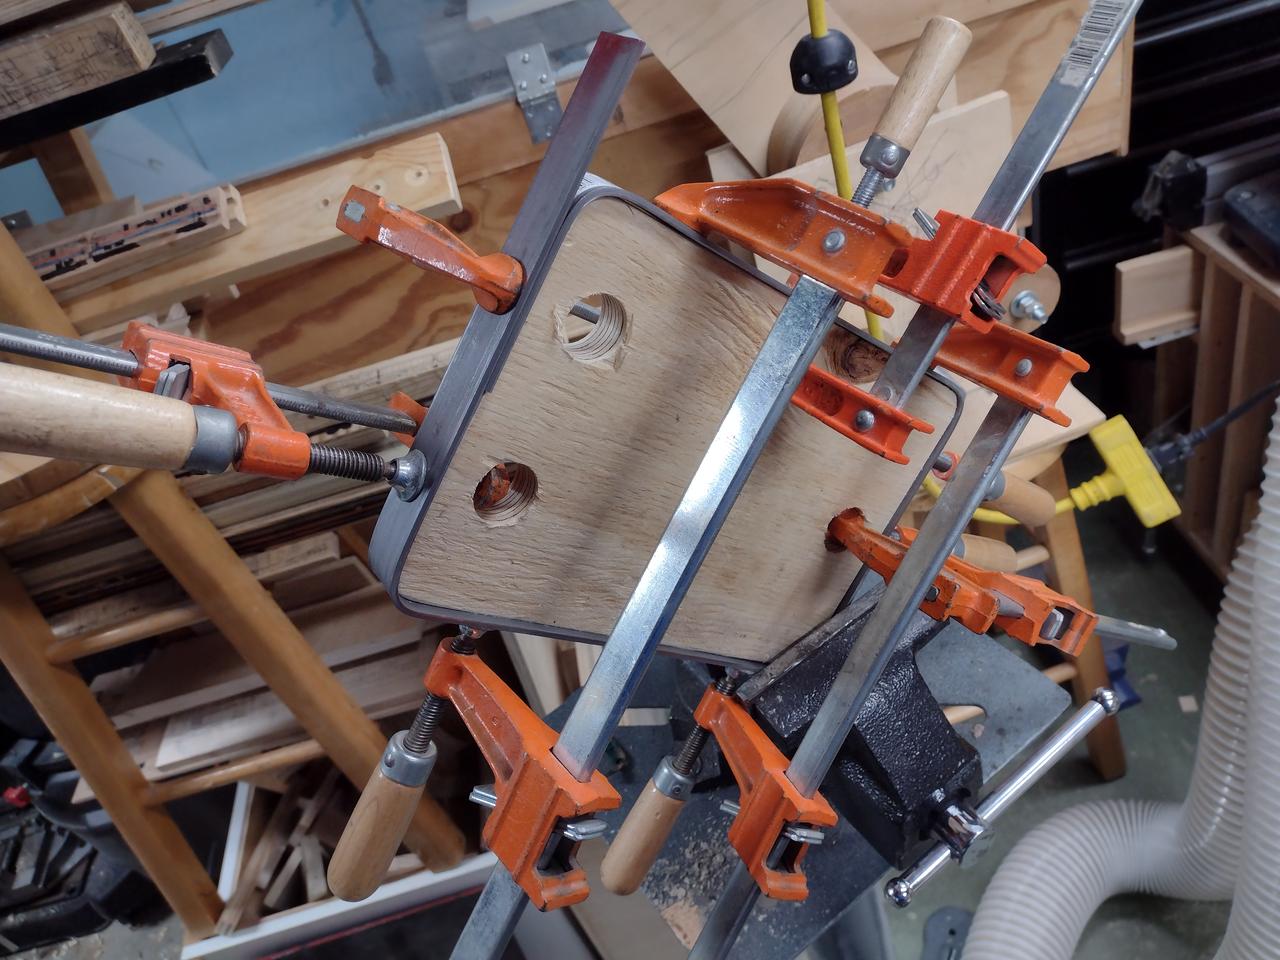
I stil needed a way to mount it close to the work-area; with out too much complexity. Magnets? clamps? -- Clamps looks like a simple option.
Using a rectangular-scrap piece of plywood, allowed me to make a bending template. I drilled a few holes around the perimeter, which allowed me the use of clamps to hold things in place, as I bent the flat-bar around it. Some welding, grinding and drilling, and I had a simple way of holding the intake-nozzle, almost anywhere. -------------------------------------
How to store a long hose?
|
|
|

|
|
|
|
|

|
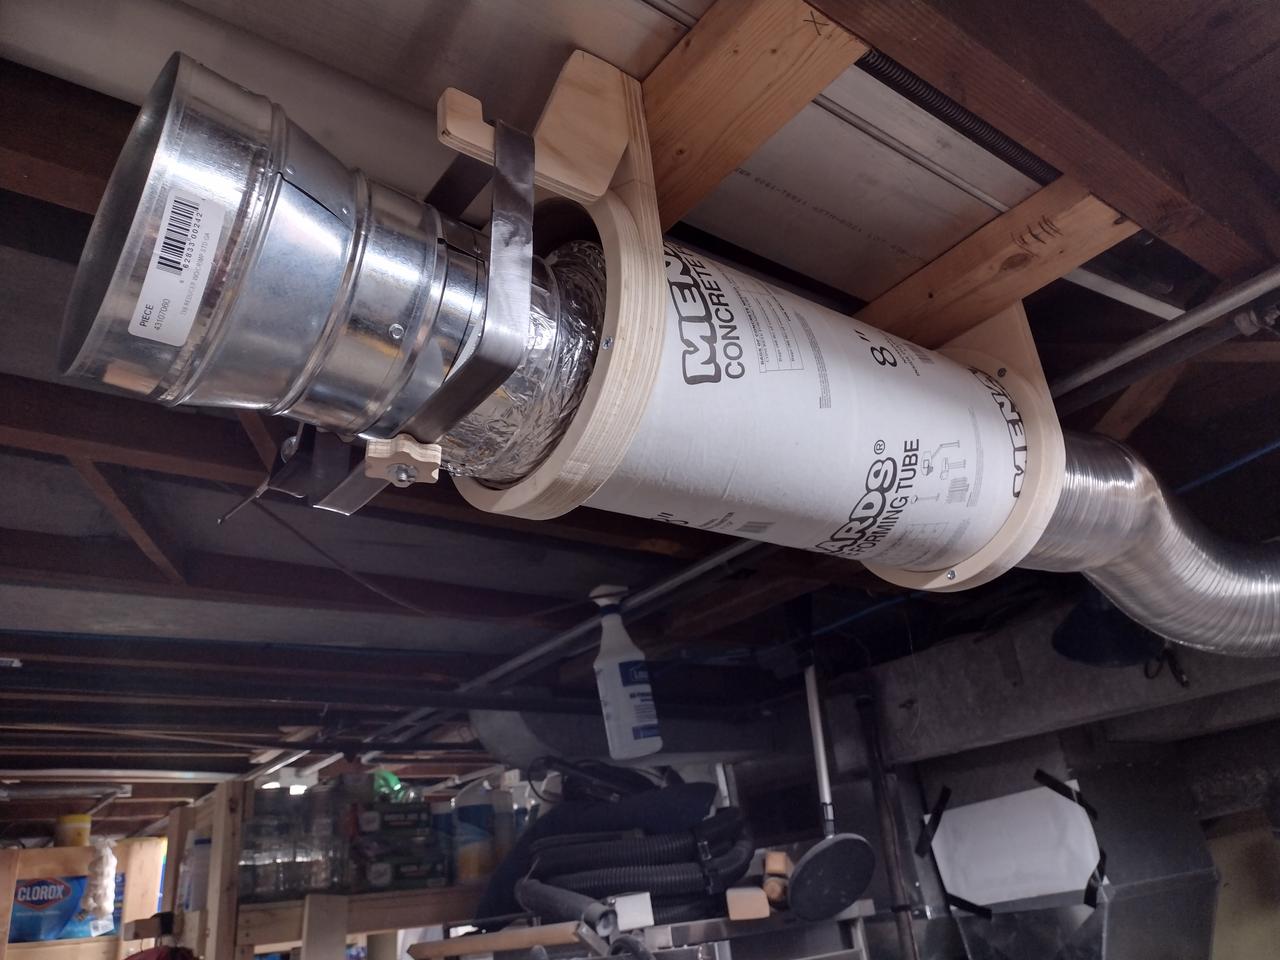
I had a 12-foot-length of exhaust-hose, used for dryers. I was debating on how I'd store something so long and cumbersome. Initially I was thinking I'd just find a fixed point, in the shop, and just permanently mount it; sort of creating a dedicated welding area.
I thought back to various welding-projects of past, and realized I used different areas, of my shop to weld; as well as different positions. I needed this hose to be mobile; so I needed a way to stow this hose.
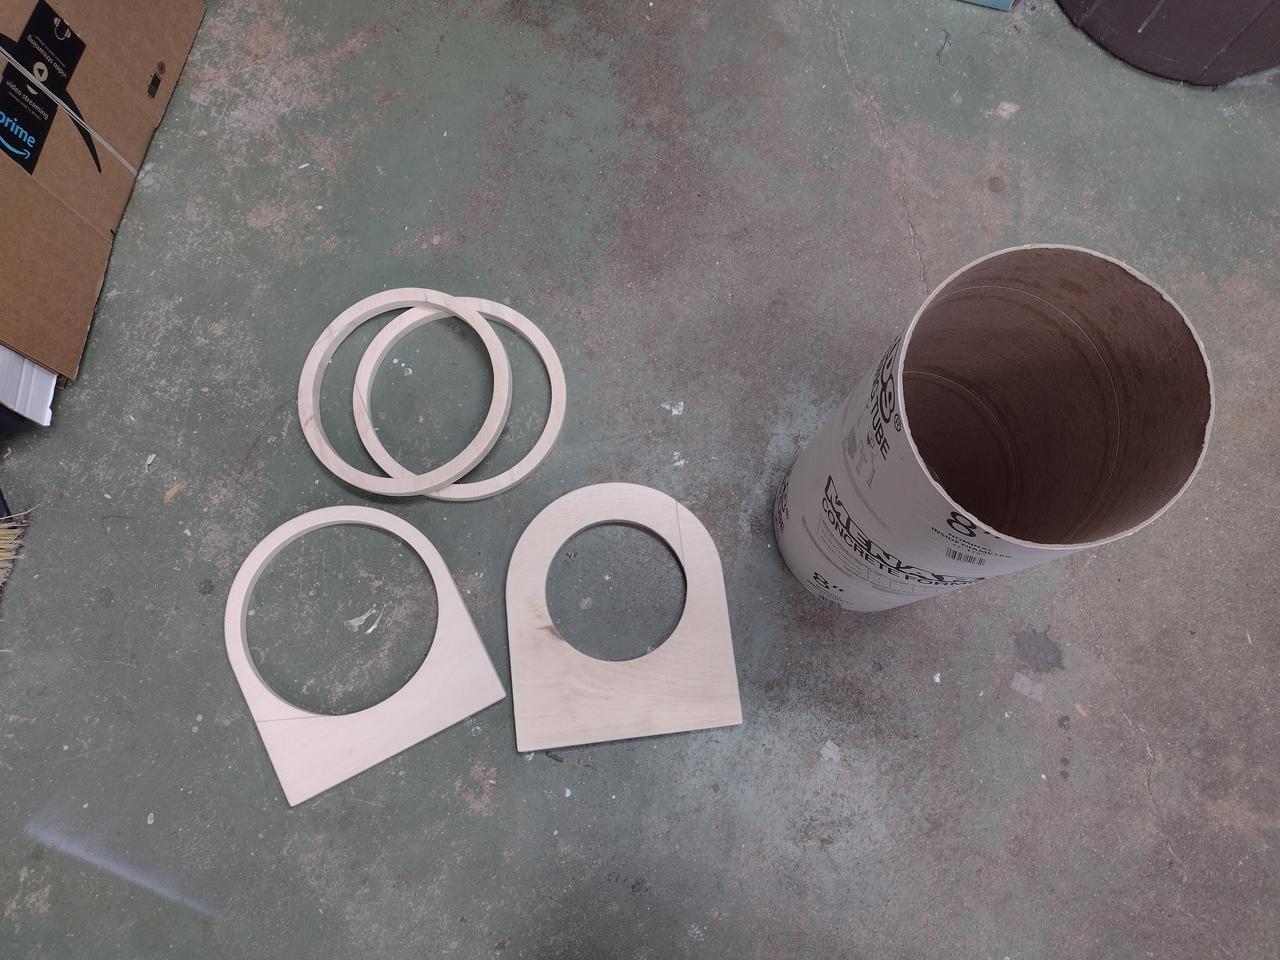
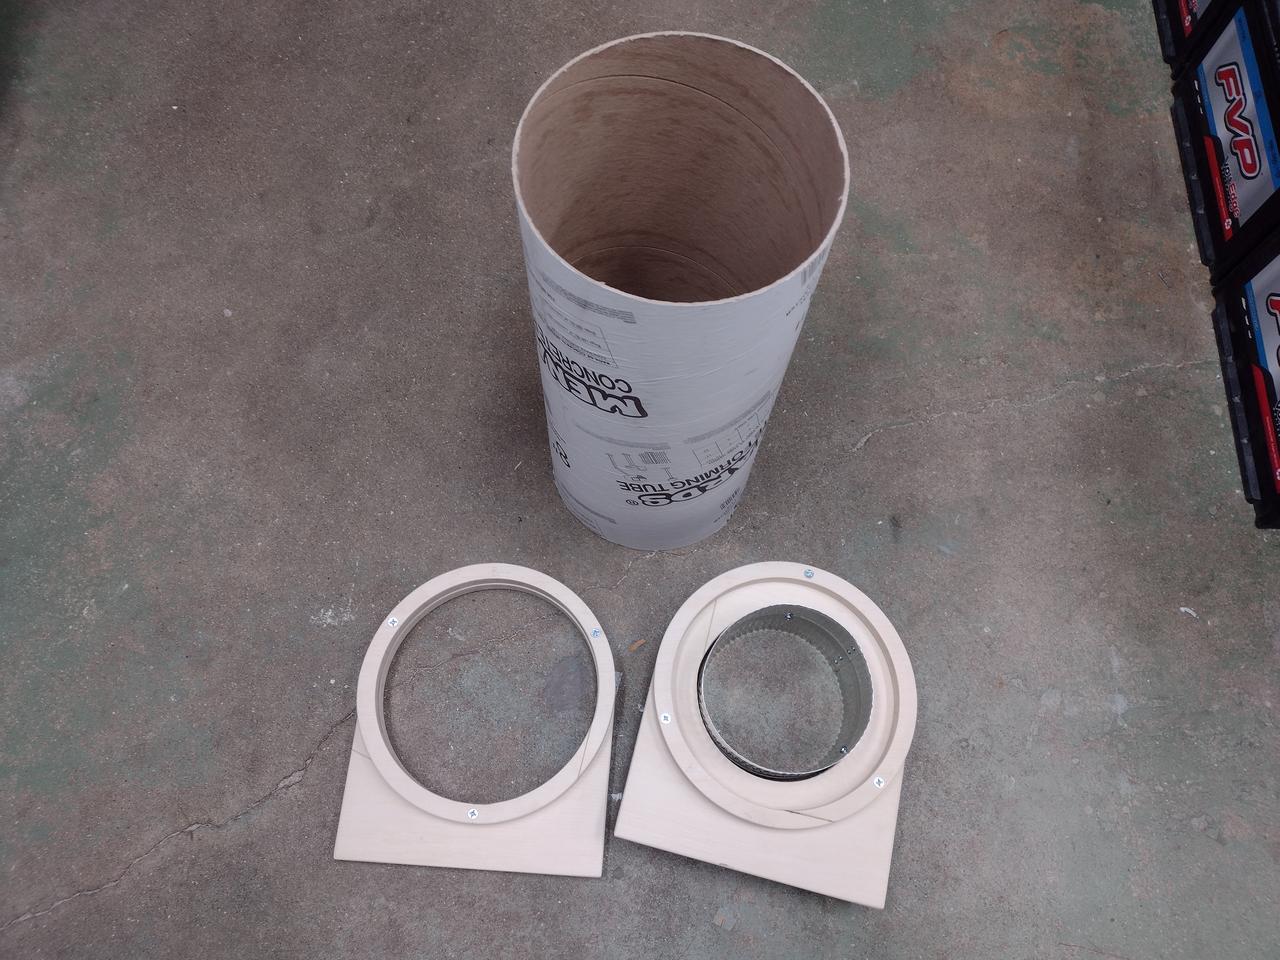
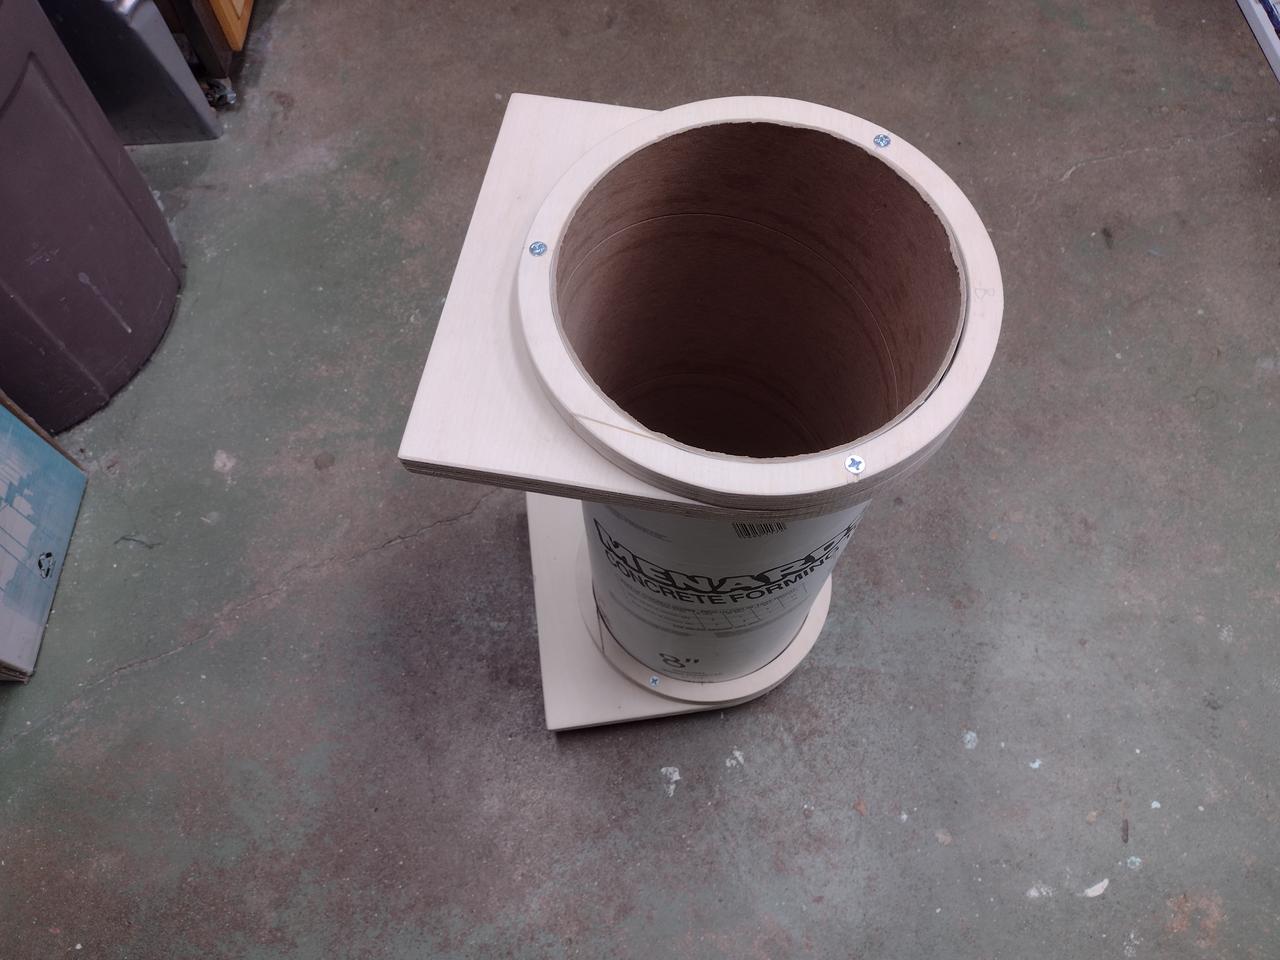
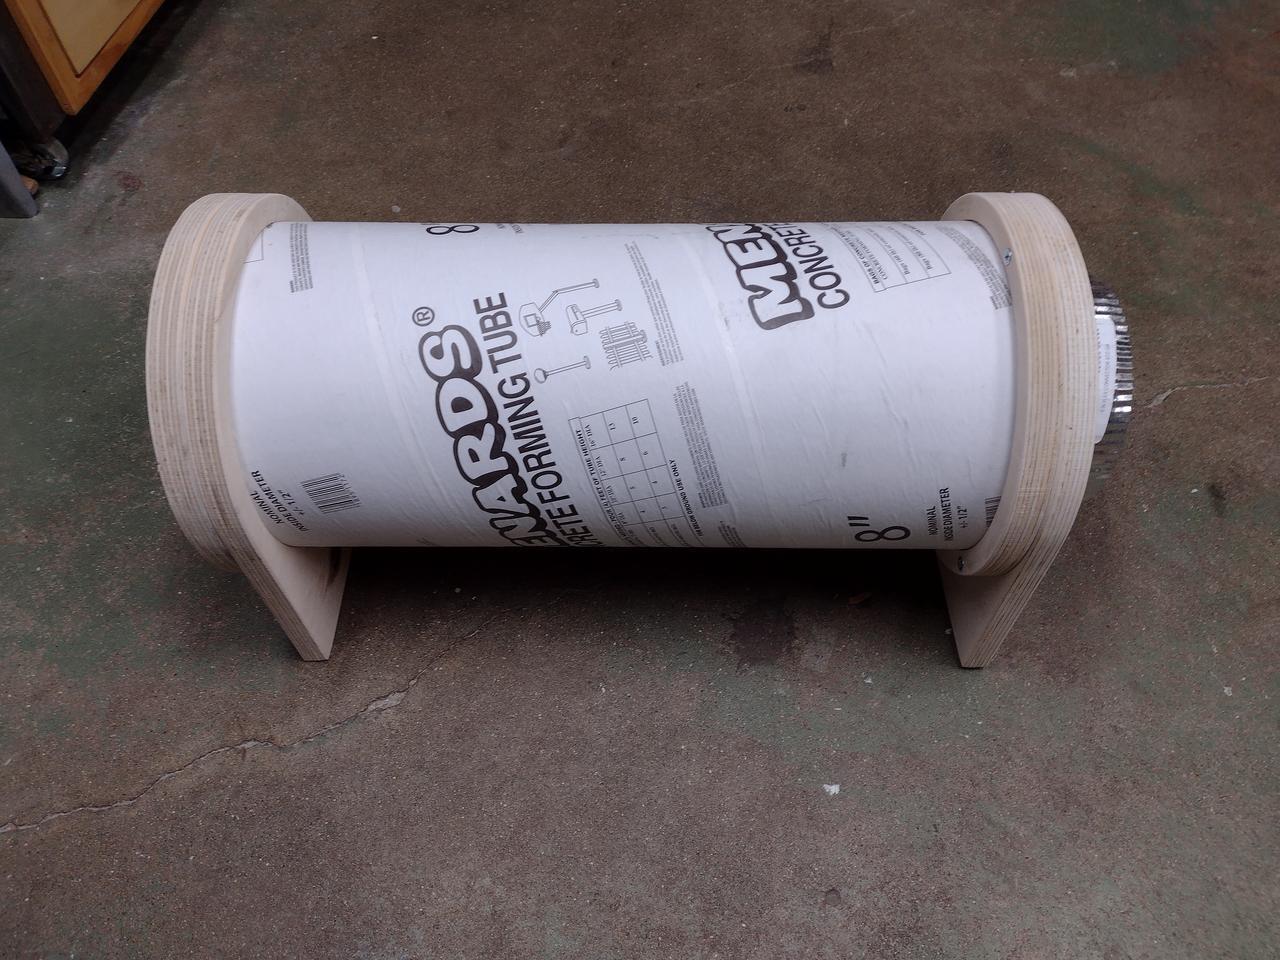
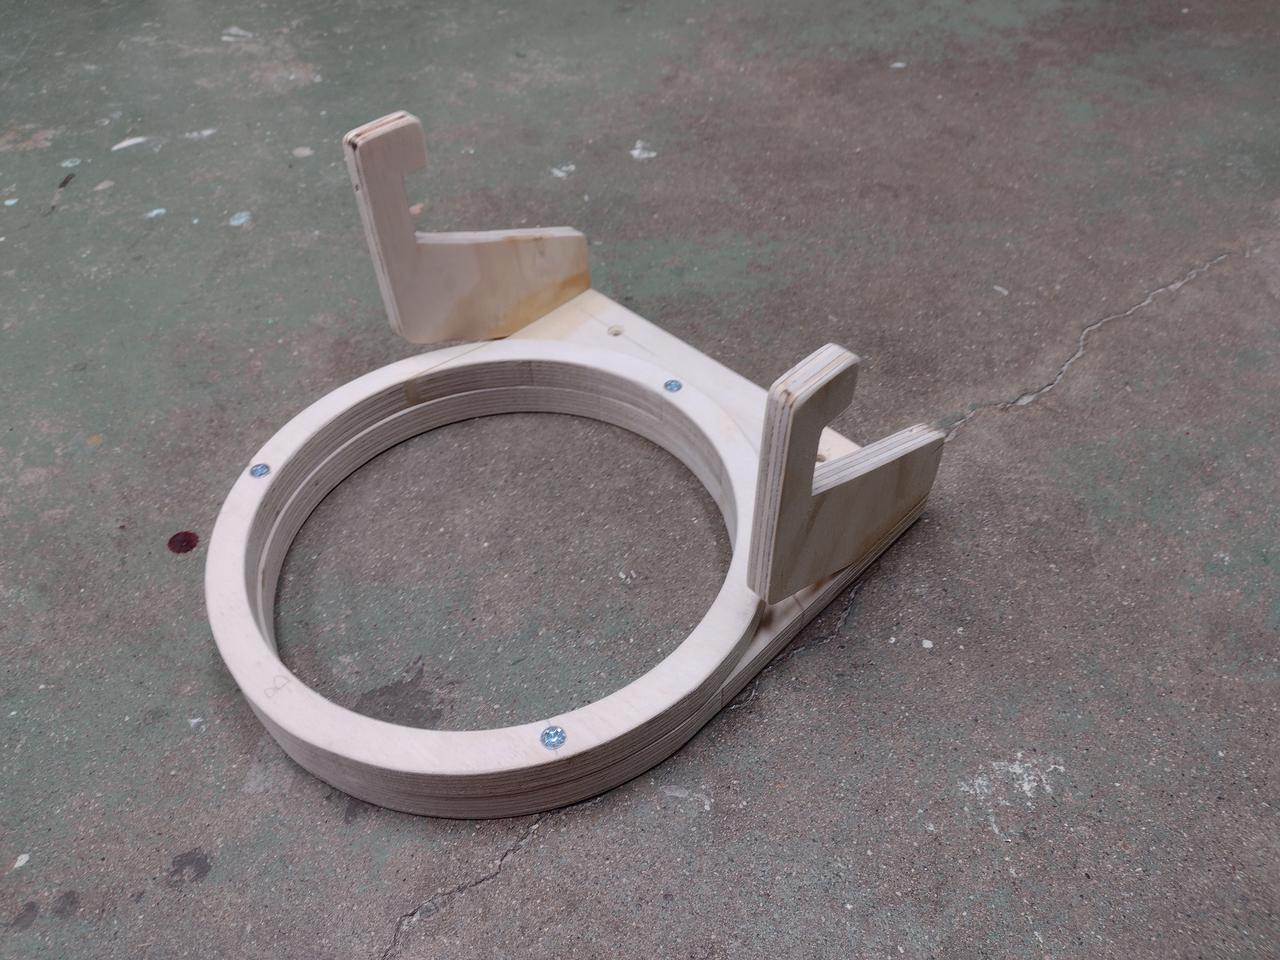
As I stood there, staring at the box, containg the compressed how, I realized; "just compress it". Initially I was going to fabricate a wooden-box, of similar size to the cardboard box; but realized that would be boring. So i settled on scrap sonotube; from a concrete-fence-post project.
To mount it, I needed to create a pair of hoops to hold things in place.
Comments